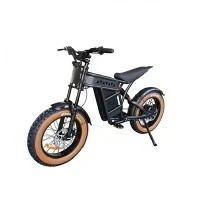
Mini fat tire bikes have gained significant popularity in recent years due to their unique combination of portability and off - road capabilities. As a supplier of mini fat tire bikes, I often receive inquiries from customers about the assembly process. In this blog, I'll delve into whether mini fat tire bikes are easy to assemble, providing insights based on my experiences in the industry.
The Basics of Mini Fat Tire Bikes
Before discussing assembly, it's important to understand the nature of mini fat tire bikes. These bikes are characterized by their smaller frames and wide, fat tires. The fat tires offer enhanced stability and traction, making them suitable for various terrains such as sand, snow, and rough trails. Mini fat tire bikes are also more convenient for storage and transportation compared to their full - sized counterparts.
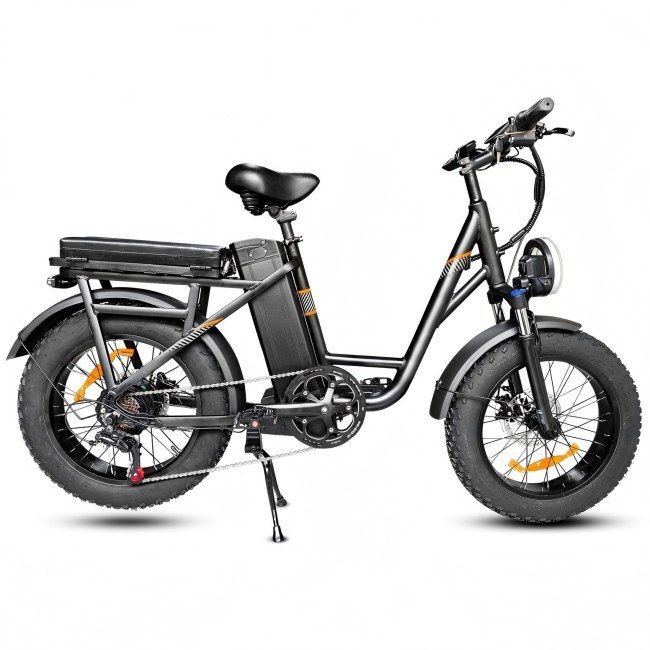
Our company offers a range of mini fat tire bikes, including Fat Tire Off Road Electric Bike, Electric Fat Tire Bikes for Adults, T Tire Mid Drive Ebike, Electric Fat Bike Snow, and Fat Tire Moped Style Ebike. Each model is designed with user - friendliness in mind, and this extends to the assembly process.
Factors Affecting Assembly Difficulty
1. Design Complexity
The design of a mini fat tire bike plays a crucial role in its assembly difficulty. Modern mini fat tire bikes are engineered to be as simple as possible. They often feature modular designs, where components can be easily connected. For example, the frame is usually pre - welded and comes in a few large pieces that fit together seamlessly. The fat tires, although wider than standard ones, are designed to be mounted on the rims with relative ease.
However, some high - end models with advanced features such as electric assist systems or complex gearing mechanisms may require a bit more technical knowledge for assembly. Our electric models, like the Electric Fat Tire Bikes for Adults, come with detailed wiring and battery installation instructions. While it may seem intimidating at first, following the step - by - step guide can make the process manageable even for novice assemblers.
2. Included Tools and Instructions
One of the key factors in determining assembly ease is the quality of the tools and instructions provided. Our mini fat tire bikes come with all the necessary tools for assembly. The toolkits are carefully selected to ensure that each component can be properly installed. For example, wrenches of the correct sizes are included for tightening bolts, and Allen keys are provided for fine - tuning adjustments.
The assembly instructions are another critical aspect. We provide clear, illustrated manuals that guide users through each step of the assembly process. These instructions are written in simple language, making them accessible to a wide range of customers. Additionally, we also offer online video tutorials that visually demonstrate the assembly process, which can be extremely helpful for those who prefer a more hands - on learning approach.

3. User Experience and Skill Level
The assembly experience can vary greatly depending on the user's prior knowledge and skill level. Someone with experience in bike repair or assembly may find the process of putting together a mini fat tire bike to be straightforward. They are likely to be familiar with basic bike components and assembly techniques, such as installing wheels, adjusting brakes, and attaching handlebars.
On the other hand, a first - time bike assembler may encounter some challenges. However, with our comprehensive instructions and support, even beginners can successfully assemble their mini fat tire bikes. We recommend that first - time assemblers take their time, read the instructions carefully, and follow the steps in order.
The Assembly Process Step - by - Step
1. Unpacking and Inspection
The first step in assembling a mini fat tire bike is unpacking the box and inspecting the contents. Carefully remove all the components from the box and check for any damage during shipping. Make sure that all the parts listed in the instruction manual are present. This is also a good time to familiarize yourself with the different components and tools.
2. Frame Assembly
Most mini fat tire bike frames are designed to be assembled in a few simple steps. Start by connecting the main frame sections if they are separate. Use the provided bolts and nuts to secure the connections tightly. Make sure that the frame is aligned properly before tightening the bolts to ensure a stable and safe ride.
3. Wheel Installation
Installing the wheels is a relatively straightforward process. First, place the wheel into the fork or rear dropout. Make sure that the wheel is centered and that the axle is properly seated in the dropouts. Then, use the provided nuts or quick - release levers to secure the wheel in place. Tighten the nuts or levers evenly to ensure that the wheel is firmly attached.
4. Handlebar and Seat Installation
Attach the handlebars to the stem using the appropriate bolts. Adjust the angle of the handlebars to your preferred position and tighten the bolts securely. Next, install the seat post into the seat tube and adjust the height to a comfortable level. Use the seat post clamp to secure the seat post in place.
5. Brake and Gear Adjustment
If your mini fat tire bike is equipped with brakes and gears, you'll need to adjust them. Follow the instructions in the manual to set the brake pads so that they make proper contact with the rims. For gears, adjust the derailleurs to ensure smooth shifting. This may require some fine - tuning, but with patience and the right tools, it can be done easily.
6. Electric Component Installation (for Electric Bikes)
For our electric models like the Electric Fat Bike Snow, installing the electric components is a crucial step. This includes mounting the battery, connecting the wiring harness, and installing the controller. Make sure to follow the safety precautions and wiring diagrams provided in the instruction manual to avoid any electrical issues.
Tips for a Smooth Assembly
- Read the Instructions: This cannot be stressed enough. Taking the time to read the instruction manual thoroughly before starting the assembly process can save you a lot of time and frustration.
- Organize Your Workspace: Keep your tools and components organized. This will make it easier to find what you need and prevent parts from getting lost.
- Take Your Time: Don't rush the assembly process. It's better to take your time and do it right than to make mistakes that could affect the safety and performance of your bike.
- Seek Help if Needed: If you encounter any difficulties during the assembly process, don't hesitate to contact our customer support team. We are always ready to assist you.
Conclusion
In general, mini fat tire bikes are relatively easy to assemble. Thanks to their modular designs, comprehensive toolkits, and detailed instructions, even first - time assemblers can successfully put together their bikes. However, the assembly process may vary depending on the complexity of the model and the user's skill level.
If you're interested in purchasing mini fat tire bikes for personal use or for your business, we'd love to hear from you. Contact us to discuss your procurement needs, and our team will be happy to provide you with more information and support.
References
- Bicycle Assembly Guides: General industry knowledge on bike assembly techniques and best practices.
- Product Manuals: The official manuals for our mini fat tire bikes, which provide detailed assembly instructions.