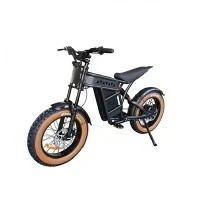
Adjusting the handlebars on a road fat tire electric bike is a fundamental maintenance task that can significantly enhance your riding experience. As a supplier of Road Fat Tire Electric Bikes, I understand the importance of ensuring that your bike is not only functional but also comfortable and tailored to your specific needs. In this blog post, I'll guide you through the process of adjusting the handlebars on your road fat tire electric bike, step by step.
Why Adjust the Handlebars?
Before we dive into the adjustment process, it's crucial to understand why you might need to adjust your handlebars. Comfort is the primary reason. Riding with handlebars that are too high, too low, or at an incorrect angle can lead to discomfort, fatigue, and even pain in your wrists, shoulders, and back. By adjusting the handlebars, you can find the optimal position that allows you to maintain a relaxed and natural riding posture.
In addition to comfort, handlebar adjustment can also improve your bike's handling and control. The right handlebar position can give you better leverage when steering, making it easier to navigate turns and corners. It can also enhance your ability to maintain balance and stability, especially at higher speeds or on uneven terrain.
Tools You'll Need
Before you start adjusting the handlebars, gather the following tools:
- Allen wrenches: Most road fat tire electric bikes use Allen bolts to secure the handlebars. You'll need the appropriate size Allen wrench to loosen and tighten these bolts.
- A torque wrench: While not strictly necessary, a torque wrench can help you ensure that you're tightening the bolts to the correct specifications. This is important to prevent over-tightening, which can damage the components, or under-tightening, which can cause the handlebars to loosen during riding.
- A measuring tape or ruler: This can be useful for making precise adjustments and ensuring that the handlebars are level and symmetric.
Step-by-Step Guide to Adjusting the Handlebars
Step 1: Prepare Your Bike
First, park your road fat tire electric bike on a flat, stable surface. Make sure the bike is turned off and the battery is disconnected to prevent any accidental movement. If your bike has a front wheel lock, engage it to keep the wheel from turning.
Step 2: Locate the Handlebar Clamp
The handlebar clamp is the component that secures the handlebars to the stem. It's usually located at the top of the stem and is held in place by one or more Allen bolts. Use your Allen wrench to loosen these bolts, but don't remove them completely. You should be able to move the handlebars freely once the bolts are loose.
Step 3: Adjust the Height
To adjust the height of the handlebars, you'll need to loosen the stem bolts. These are typically located on the side of the stem and are also secured with Allen bolts. Loosen the bolts just enough to allow the stem to move up or down within the fork steerer tube.
Use your measuring tape or ruler to measure the distance from the ground to the top of the handlebars. This will help you ensure that you're making the same adjustment on both sides. Once you've determined the desired height, carefully slide the stem up or down to the new position. Make sure the stem is centered within the fork steerer tube and that the handlebars are level.
Step 4: Adjust the Angle
In addition to height, you may also want to adjust the angle of the handlebars. This can help you achieve a more comfortable riding position and improve your control of the bike. To adjust the angle, simply rotate the handlebars forward or backward while holding the stem in place.
As you rotate the handlebars, pay attention to the position of your hands and wrists. You want to find an angle that allows you to grip the handlebars comfortably without straining your muscles. Once you've found the desired angle, use your Allen wrench to tighten the handlebar clamp bolts. Make sure the bolts are tightened evenly on both sides to prevent the handlebars from shifting.
Step 5: Check the Alignment
After adjusting the height and angle of the handlebars, it's important to check the alignment to ensure that the handlebars are straight and centered. Stand in front of the bike and look down at the handlebars. They should be parallel to the front wheel and centered over the bike frame.
If the handlebars are not straight, you can use your hands to gently adjust them until they are aligned. Once the handlebars are straight, use your Allen wrench to tighten the stem bolts. Make sure the bolts are tightened to the correct torque specifications to prevent the stem from slipping.
Step 6: Test the Adjustment
Once you've completed the adjustment, it's time to test the handlebars to make sure they're comfortable and secure. Sit on the bike and hold the handlebars in your normal riding position. Check to see if the handlebars feel comfortable and if you have good control of the bike.
If the handlebars feel too high or too low, or if they're at an uncomfortable angle, you may need to make further adjustments. Remember, it may take a few tries to find the perfect position, so don't be afraid to experiment.
Tips for a Successful Adjustment
- Take your time: Adjusting the handlebars is not a rushed task. Take your time to make precise adjustments and ensure that the handlebars are secure before riding.
- Use a torque wrench: As mentioned earlier, a torque wrench can help you ensure that you're tightening the bolts to the correct specifications. This is especially important for components like the stem and handlebar clamp, which can affect the safety and performance of your bike.
- Check for clearance: Before tightening the bolts, make sure there is enough clearance between the handlebars and other components of the bike, such as the brake levers, shifters, and cables. You don't want the handlebars to rub against these components, as this can cause damage and affect the performance of your bike.
- Seek professional help if needed: If you're unsure about any aspect of the adjustment process, or if you're unable to achieve the desired results on your own, don't hesitate to seek professional help. A qualified bike mechanic can help you make the necessary adjustments and ensure that your bike is in top condition.
Our Road Fat Tire Electric Bikes
At our company, we offer a wide range of 1000 Watt Fat Tire Ebike designed to meet the needs of riders of all levels. Whether you're a beginner looking for a comfortable and easy-to-ride bike or an experienced rider seeking a high-performance machine, we have the perfect bike for you.
Our Electric Fat Bike Snow are equipped with powerful motors and long-lasting batteries, allowing you to tackle any terrain with ease. The fat tires provide excellent traction and stability, making them ideal for riding on snow, sand, mud, and other challenging surfaces.
If you're looking for a more compact and portable option, our 20 Fat Tire Folding Electric Bike is the perfect choice. It can be easily folded and stored in a car trunk or a small apartment, making it convenient for commuting and traveling.


For adults who want a reliable and comfortable electric bike, our Electric Fat Tire Bikes for Adults are designed with your needs in mind. They feature adjustable handlebars and seats, allowing you to customize the riding position for maximum comfort.
And if you're looking for the ultimate in performance and versatility, our All Wheel Drive Electric Fat Bike is the bike for you. With power to both the front and rear wheels, this bike provides unparalleled traction and control, making it perfect for off-road adventures.
Contact Us for Procurement
If you're interested in purchasing our road fat tire electric bikes or have any questions about handlebar adjustment or other maintenance issues, please don't hesitate to contact us. Our team of experts is always ready to assist you and provide you with the information you need to make an informed decision.
We offer competitive pricing, high-quality products, and excellent customer service. Whether you're a bike shop owner, a distributor, or an individual buyer, we can work with you to meet your needs and ensure your satisfaction.
References
- "Bicycle Maintenance Handbook" by Park Tool Company
- "Zinn and the Art of Mountain Bike Maintenance" by Lennard Zinn